Shape Construction with Paper: Materials and Practical Activities Primary 4 (Basic 4) Second Term Week 11 Basic Science and Technology
SHAPE CONSTRUCTION WITH PAPER, MATERIALS USED FOR SHAPE CONSTRUCTION, SHAPE CONSTRUCTION USING PAPER (PRACTICAL ACTIVITIES) SECOND TERM WEEK 11 BASIC SCIENCE AND TECHNOLOGY
BASIC SCIENCE AND TECHNOLOGY
SECOND TERM
WEEK 11
PRIMARY 4 (BASIC 4)
THEME – LIVING AND NON LIVING THINGS
PREVIOUS LESSON – Measuring Solids and Time: Metric Units, Materials, Accurate Measurement and Improvisation Primary 4 (Basic 4) Second Term Week 10 Basic Science and Technology
TOPIC – SHAPE CONSTRUCTION WITH PAPER
LEARNING AREA
1. Introduction
2. Materials Used for Shape Construction
3. Shape Construction Using Paper (Practical Activities)
4. Weekly Assessment/Assignment/Test Questions and Answers
5. Summary
LEARNING OBJECTIVES
By the end of the lesson, pupils should be able to:
1. Explain the meaning of shape construction.
2. Identify materials used for shape construction.
3. Construct simple shapes using paper.
4. Mention examples of shapes formed from paper.
5. Demonstrate creativity in making shapes.
ENTRY BEHAVIOUR
Pupils have previously learned about measuring solids and time and also identified different shapes in their environment such as square, rectangle, triangle, and circle.
This lesson builds on that knowledge by helping pupils understand how these shapes can be constructed and designed using paper and simple materials, thereby improving their creativity and understanding of shapes.
INSTRUCTIONAL MATERIALS
The teacher will teach the lesson with the aid of:
1. Coloured paper
2. Cardboard
3. Scissors
4. Glue
5. Ruler
6. Pencil
7. Crayons
8. Charts showing shapes (square, rectangle, triangle, circle)
METHOD OF TEACHING
Choose a suitable and appropriate methods for the lessons.
Note – Irrespective of choosing methods of teaching, always introduce an activities that will arouse pupil’s interest or lead them to the lessons.
REFERENCE MATERIALS
1. Scheme of Work
2. 9 – Years Basic Education Curriculum
3. Course Book
4. All Relevant Material
5. Online Information
CONTENT OF THE LESSON
INTRODUCTION
Shapes are found everywhere in our environment. We see shapes in books, tables, buildings, and toys. We can also create shapes using paper and other materials.
LESSON 1 – MEANING OF SHAPE CONSTRUCTION
Shape construction is the process of making or forming different shapes using materials such as paper, cardboard, or other objects.
Materials Used for Shape Construction
1. Paper
2. Cardboard
3. Scissors
4. Glue
5. Ruler
6. Pencil
7. Crayons or colours
Examples of Shapes That Can Be Constructed
- Square
- Rectangle
- Triangle
- Circle
- Cube (simple model)
- Cylinder (paper roll)
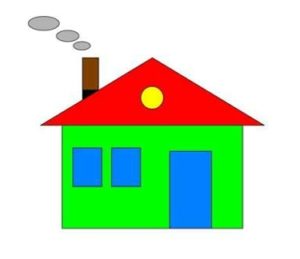
- Squares, rectangle, triangle and circle constructed can be used to construct shapes such as car, house, human face, Christmas tree, aeroplane, etc. as shown below:


LESSON 2 – SHAPE CONSTRUCTION USING PAPER (PRACTICAL ACTIVITIES)
Note: There are six activities. Each activity should be assigned to different groups so that each group can be used to create a new shape.
ACTIVITY 1: Making a Square Shape
Materials:
- Paper
- Ruler
- Pencil
- Scissors
Procedure:
- Draw four equal sides using a ruler.
- Cut out the shape carefully.
- Check that all sides are equal.
ACTIVITY 2: Making a Triangle
Materials:
- Paper
- Ruler
- Pencil
- Scissors
Procedure:
-
Draw three sides joined together.
- Cut out the triangle shape.
ACTIVITY 3: Making a Rectangle
Materials:
- Paper
- Ruler
- Pencil
- Scissors
Procedure:
- Draw two long sides and two short sides.
- Cut out the shape carefully.
ACTIVITY 4: Making a Circle
Materials:
- Paper
- Compass or round object
- Pencil
- Scissors
Procedure:
- Trace a round object on paper.
- Cut out the circle carefully.
ACTIVITY 5: Making a Cube (Simple Model)
Materials Needed:
- Cardboard paper
- Ruler
- Pencil
- Scissors
- Glue
Procedure
- Draw six equal squares on cardboard (net of a cube).
- Cut out the shape carefully.
- Fold along the lines.
- Apply glue to join the edges together.
- Allow it to dry.
Observation
- A solid shape with equal sides (cube) is formed.
Conclusion
- A cube can be constructed using cardboard paper and simple tools.
ACTIVITY 6: Making a Cylinder (Paper Roll)
Materials Needed:
- Paper or cardboard
- Glue or tape
- Scissors
- Ruler
- Pencil
Procedure
- Cut a rectangular sheet of paper.
- Roll the paper from one side to form a tube.
- Apply glue or tape to hold it in place.
- Cut two circular pieces for the top and base.
- Fix the circles to both ends of the rolled paper.
Observation
- A cylindrical shape is formed.
Conclusion
- A cylinder can be made by rolling paper and attaching circular ends.
LESSON 3 – IMPORTANCE OF SHAPE CONSTRUCTION
1. It helps pupils understand shapes better.
2. It improves creativity and drawing skills.
3. It helps in art and craft activities.
4. It is useful in building and design work.
WEEKLY ASSESSMENT/HOMEWORK/TEST QUESTIONS AND ANSWERS
A. Answer the Questions
1. What is shape construction?
2. What shape is formed when six equal squares are joined together?
3. Mention two materials used in making a cube model.
4. How is a cylinder formed using paper?
5. Mention one use of a cylinder in real life.
B. Fill in the Blanks
6. A cube is made from six equal __________.
7. A cylinder is made by rolling a __________ into a tube.
8. __________ is used to join parts of paper shapes together.
9. A cube has equal __________ on all sides.
10. A cylinder has two __________ ends.
C. True or False
11. A cube can be made using paper. ______
12. A cylinder has no circular base. ______
13. Glue helps to hold paper shapes together. ______
14. Six squares can form a cube. ______
15. A cylinder is formed by folding paper only. ______
D. Matching
Match the shape with its description:
16. Cube → A. Used to form a tube shape
17. Cylinder → B. Solid shape with equal sides
18. Glue → C. Used to join materials
19. Square → D. Flat shape with four equal sides
10. Paper roll → E. Round solid shape
ANSWER KEYS
1. Shape construction is the process of making shapes using materials like paper or cardboard.
2. Cube
3. Cardboard, paper, glue, scissors (any two).
4. By rolling a rectangular paper and attaching circular ends.
5. Tin, cup, drum, bottle (any one).
6. squares
7. paper
8. glue
9. sides
10. circular
11. True
12. False
13. True
14, True
15. False
16. B. Solid shape with equal sides
17. E. Round solid shape
18. C. Used to join materials
19. D. Flat shape with four equal sides
20. A. Used to form a tube shape
SUMMARY
In this lesson, pupils learned that shape construction is the process of making different shapes using materials such as paper and cardboard.
- A cube is a solid shape made by joining six equal squares together.
- A cylinder is formed by rolling a rectangular paper into a tube and adding two circular ends.
- Pupils also learned the materials used in shape construction such as paper, cardboard, glue, scissors, ruler, and pencil.
- Through practical activities, pupils understood how to construct simple 3D shapes using local materials.
Overall, the lesson helps pupils develop creativity and better understanding of geometric shapes in everyday life.
PRESENTATION
To deliver the lesson, the teacher adopts the following steps:
1. The teacher displays different paper shapes such as square, triangle, rectangle, and circle.
Pupils’ Activities: The pupils observe and identify the shapes.
2. The teacher asks pupils to mention shapes they have seen around them.
Pupils’ Activities: The pupils respond by mentioning shapes in books, tables, doors, and windows.
3. The teacher introduces the topic: Shape Construction with Paper.
Pupils’ Activities: The pupils repeat the topic.
4. The teacher explains the meaning of shape construction.
Pupils’ Activities: The pupils listen attentively.
5. The teacher shows materials used for shape construction such as paper, scissors, ruler, glue, and pencil.
Pupils’ Activities: The pupils identify the materials.
6. The teacher demonstrates how to draw and cut simple shapes like square, triangle, rectangle, and circle.
Pupils’ Activities: The pupils observe carefully.
7. The teacher guides pupils to construct their own shapes using paper.
Pupils’ Activities: The pupils carry out the practical activity.
8. The teacher corrects pupils’ work and helps those having difficulties.
Pupils’ Activities: The pupils adjust their work where necessary.
9. The teacher allows pupils to display their constructed shapes.
Pupils’ Activities: The pupils present their shapes to the class.
10. The teacher summarizes the lesson by revising materials, meaning, and steps for shape construction.
Pupils’ Activities: The pupils participate in the summary and answer questions.
CONCLUSION
To conclude the lesson for the week, the teacher revises the entire lesson and links it to the following week’s lesson.
NEXT LESSON
LESSON EVALUATION
Teacher asks pupils,
1. What is shape construction?
2. Mention three materials used for shape construction.
3. Name four shapes you can construct with paper.
4. Why is shape construction important?
5. What shape has three sides?

How to Become A Christian | Steps to Become A Christian | Weekly Assessment (Test) Primary 1 (Basic 1) – Christian Religious Studies

Recycling for Functional Art Works I – Uses of Recycled Products (Primary 6)

Lagos State Government Employment Opportunities – Lagos State Teaching Service Commission (Tescom)
About The Author
Alabi M. S.
Michael is a Principal Education Officer at LASUBEB with over 15 years of experience in teaching and learning. He is passionate about developing plan lesson notes and promoting quality assurance in education. Michael strongly believes that teachers inspire the future and play a vital role in shaping the next generation.