How to Start The Computer Primary 2 (Basic 2) Term 3 Week 7 Information Technology
INFORMATION TECHNOLOGY
COMPUTER STUDIES
BASIC SCIENCE AND TECHNOLOGY
THIRD TERM
WEEK 7
PRIMARY 2
THEME – BASIC COMPUTER OPERATIONS
PREVIOUS LESSON – Draw and Label A System Unit (Primary 2)
TOPIC: HOW TO START THE COMPUTER
LEARNING AREA
1. Identification Parts of Computer System
2. Connecting Different Parts of Computer System
3. Start the Computer
4. Lesson Evaluation and Weekly Assessment
PERFORMANCE OBJECTIVES
By the end of the lesson, the pupils should have attained the following objectives:
1. Describe computers.
2. Identify different parts of computer system.
3. connecting different parts of computer together.
4. start the computer.
INSTRUCTIONAL MATERIALS
The teacher will teach the lesson with the aid of:
1. Functional computers system
2. Different types of computer cables
METHOD OF TEACHING
Choose a suitable and appropriate methods for the lessons.
Note – Irrespective of choosing methods of teaching, always introduce an activities that will arouse pupil’s interest or lead them to the lessons.
REFERENCE MATERIALS
Scheme of Work
9 – Years Basic Education Curriculum
Course Book
All Relevant Material
Online Information
CONTENT OF THE LESSON
LESSON 1 – INTRODUCTION
Computer systems is a collection of different parts of hardware, software and liveware that are designed to receive, process, manage and present information in a meaningful format.
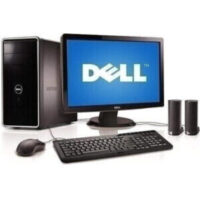
These parts include the monitor, system unit (CPU), keyboard, printer, scanner, speakers, and modem.
CONNECTING DIFFERENT PARTS OF COMPUTER SYSTEMS
In connecting different parts of computer systems, the following steps must be taken –
Step 1 – Connect the monitor to the system unit.
Step 2 – Connect the keyboard to the system unit.
Step 3 – Connect the mouse and keyboard to the system unit.
Step 4 – Connect the printer to the system unit and connect the printer to the source of electricity.
Step 5 – Connect the system unit to the source of electricity (the socket).
STARTING UP A COMPUTER
After connecting different parts of a computer together, the next steps are as follows:
Step 6 – Start the monitor – press down the power button on the monitor.
Step 7 – Start the system unit – press down the power button on the system unit and allow to boot.
LESSON 2 – STARTING UP A COMPUTER
Practical demonstration of connecting different part of a computer and start the computer.
PRESENTATION
To deliver the lesson, the teacher adopts the following steps:
1. To introduce the lesson, the teacher revises the previous lesson. Based on this, he/she asks the pupils some questions;
2. Teacher organizes the pupils into groups depending on the size of the class.
3. Teacher displays a functional computer (if available) or chart showing different parts of a computer for the pupils as groups to identify, describe and state their uses.
4. Teacher lets the pupils as groups identify and discuss different parts of computer.
Pupil’s Activities – The pupils identify and discuss different parts of a computer system.
5. Teacher uses the functional computer or the chart to introduce the lesson – Starting up a Computer.
Pupil’s Activities – The pupils pat attention to the lesson introduction.
6. Teacher guides the pupils to connect different parts of a computer system (if available) together or uses the chart and their relevant responses in activity 4 to steps in connecting parts of a computer system together.
Pupil’s Activities – The pupils pat attention to the teacher guidelines on how to connect the parts of a computer system together.
7. Teacher allows the pupils to demonstrate how to connect the parts of a computer system together.
Pupil’s Activities – The pupils participate actively in connecting different parts of computer systems together.
8. Teacher summarizes the lesson on the board with appropriate evaluation.
Pupil’s Activities – The pupils participate actively in the summary of the lesson by responding correctly to most of the questions write as instructed.
CONCLUSION
To conclude the lesson for the week, the teacher revises the entire lesson and links it to the following week’s lesson – uses of computer cables.
Next Lesson – Start Taken to Start Up Computer System (Primary 2)
LESSON EVALUATION
Teacher asks pupils to:
1. identify and discuss the important parts of a computer systems.
2. connect different parts of computer systems together.
3. start the computer.

Meaning and Benefit of Neighborhood Security and Neighborhood Security Watch Primary 4 (Basic 4) – Security Education
Different ways of Greetings (Primary 1)
Meaning and Importance of Technology – ASEI PDSI (Primary 4)
About The Author
Alabi M. S.
Michael is a Principal Education Officer at LASUBEB with over 15 years of experience in teaching and learning. He is passionate about developing plan lesson notes and promoting quality assurance in education. Michael strongly believes that teachers inspire the future and play a vital role in shaping the next generation.