Meaning of Line | Types of Lines | Importance/Uses of Lines Primary 4 (Basic 4) – Cultural and Creative Arts
CULTURAL AND CREATIVE ARTS
FIRST TERM
WEEK 3
PRIMARY 4
THEME: ARTS AND CRAFTS
TOPIC – MEANING AND TYPES OF LINES
LEARNING AREA
1. Introductory Activities
2. Meaning of Line
3. Types of Lines
4. Importance/Uses of Lines
5. Lesson Evaluation and Weekly Assessment (Test)
PERFORMANCE OBJECTIVES
By the end of the lesson, the pupils should have attained the following objectives (cognitive, affective and psychomotor) and be able to:
1. explain the meaning of lines;
2. mention types of lines;
3. draw lines;
4. make decorative designs with lines.
ENTRY BEHAVIOR
The pupils can identify and draw different types of lines.
INSTRUCTIONAL MATERIALS
The teacher will teach the lesson with the aid of:
1. Pictures
2. Books
3. Ruler
4. Pencil
5. Paper
6. Cardboard sheets
7. Samples of line decorations
8. Eraser
9. board, etc.
METHOD OF TEACHING
Choose a suitable and appropriate methods for the lessons.
Note – Irrespective of choosing methods of teaching, always introduce an activities that will arouse pupil’s interest or lead them to the lessons.
REFERENCE MATERIALS
Scheme of Work
9 – Years Basic Education Curriculum
Course Book – Fundamentals of Cultural and Creative Art Book 4
All Relevant Material
Online Information
CONTENT OF THE LESSON ONE
LESSON 1 – INTRODUCTORY QUESTION
Teacher’s Activities – Ask the pupils to bring out their pencil and ruler to draw a straight line. Draw a curve line and ask them to compare the line on the board to the one they drawn.
Pupil’s Activities – Participate actively drawing activities. The line on the board is a curve (bend) line. We have drawn a straight line.
Teacher’s remark – Good job you. Line is one of the elements of design as discussed in our previous lesson. It is very important in design.
Draw thin and thick lines, horizontal and vertical lines, broke and dotted lines, etc. for the pupils to identify and compare the lines. Discuss the meaning and types of lines on the board.
MEANING OF LINE
A line is a straight or curved mark made by using marking materials like pen, pencil, etc.
A line can be thin or thick line. When two or more lines are combined, a shape, image or sign is formed. Line is one of the important elements of design.
TYPES OF LINES
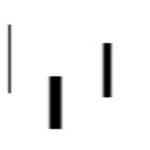
1. VERTICAL LINES
Vertical lines are straight lines that move up and down without any slant.
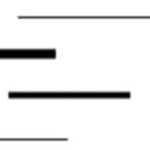
2. HORIZONTAL LINES
Horizontal lines are straight lines that are parallel to the horizon.
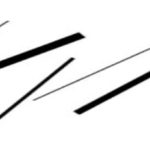
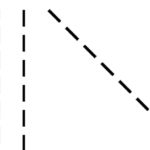
3. DIAGONAL LINES
Diagonal lines are straight thin or thick lines that slant.
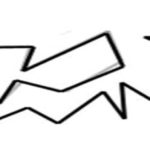
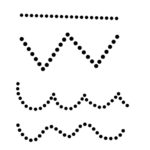
4. ZIGZAG LINES
Zigzag lines are straight thin or thick lines made from a combination of diagonal lines.
5. CURVED LINES
Curved lines are thin or thick lines that change direction gradually.
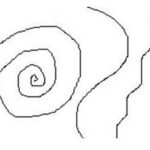
6. DOTTED LINES
Dotted lines are lines made up of a series of dots.
7. DASH LINES
Dotted lines are lines made up of a series of dots.
8. PARALLEL LINES
Parallel lines are lines in a plane that are always the same distance apart. For example, equal sign.
______________________
______________________
9. PERPENDICULAR LINES
Perpendicular lines are lines that intersect at right angles. For example, a cross or addiction sign.

LESSON 2 – INTRODUCTORY ACTIVITIES
ACTIVITY 1
Teacher’s Activities – Display chart showing road signs, road marking, football pitch, etc. for the pupils to identify and lead them to discuss the importance of lines.
Pupil’s Activities – Participate actively in the class discussion.
Teacher’s remark – The importance of lines are undeniable. As you can see the picture, line shows direction, etc. Summary the key points on the board.
USES/IMPORTANCE OF LINES
1. It is used to indicate a part.
2. It is used show direction.
3. It is used as a symbol.
4. It is used as a plan.
5. It is used to make a sketch.
6. It is used to mark out.
7. It is used to cut out a part.
8. It is used as measurement.
ACTIVITY 2
Teacher’s Activities – Give the pupils the following instructions:
- Draw a straight, horizontal line using a ruler.
- Make a shorter vertical line coming down from one end of the first line.
- Draw a horizontal line coming off the bottom end of the vertical line.
- Draw a vertical line between the ends of the two horizontal lines.
What shape is this?
Pupil’s Activities – Participate actively and follow the teacher’s instructions. This is a rectangle.
Teacher’s remark – Correct. A shape is formed when two or more lines are drawn or combined.
LESSON 3 – FURTHER ACTIVITIES
Instruction 1.
- Draw a large upside down “V”.
- Draw a straight line at an upward angle to the left.
- Draw a straight horizontal line across your drawing, ending at the right side.
- Draw a straight line at a downward angle back to your starting point.
- Lift your pencil from the paper.
- Erase the lines well if you don’t want them to be visible in the center of the star.
What shape is this?
Reference – Wiki How Dot Com
INSTRUCTION FOR DRAWING PATTERNS
INSTRUCTION 2
- Draw a row of dots.
- Draw a small circle around each dot.
- Draw a bigger circle around the circles you just drew.
- draw flower petal shapes around each circle.
- Under each flower, draw a small circle.
- In between each flower, draw 2 raindrop shapes. One raindrop shape will veer left and the other will veer right.
EXPECTED PATTERN

INSTRUCTION 3
- Draw a row of dots.
- Draw a small circle around each dot.
- Draw another circle around each circle.
- Draw a very small circle at the top and bottom and left and right of each circle.
- Draw a curve connecting each small bottom circle to the one next to it.
- Draw a curve connecting each small top circle to the one next to it.
- In between each circular shape, on the bottom draw two raindrop shapes: one leaning left and one leaning right.
- In between each circular shape, on the top draw two UPSIDE down raindrop shapes: one leaning left and one leaning right.
- On top and on bottom, draw a row of “bumps” or “humps”.
EXPECTED PATTERN

Reference – Art Is Fun Dot Com
PRESENTATION
To deliver the lesson, the teacher adopts the following steps:
1. To introduce the lesson, the teacher revises the previous lesson. Based on this, he/she asks the pupils some questions;
2. Explains different types of lines with the aid of diagrams.
Pupil’s Activities – Listen and observe demonstration on how to use lines in designs.
3. Demonstrates how to use lines in designs.
Pupil’s Activities – Draw lines to create designs.
4. Teacher’s/Pupil’s Activities – Displays Pupil’s finished works.
5. Demonstrates how lines and curves can be combined to create patterns;
Pupil’s Activities – Create patterns using lines and curves.
6. Summary the key points on the board.
Pupil’s Activities – Copy as the teacher write.
CONCLUSION
To conclude the lesson for the week, the teacher revises the entire lesson and links it to the following week’s lesson.
NEXT LESSON – Shapes
LESSON EVALUATION
Ask pupils to:
1. name types of lines;
2. draw some lines and curves;
3. arrange lines and curves to form patterns;
4. display work.
WORKBOOK
WEEKLY ASSESSMENT (TEST)
1. ________ is a straight or curved mark made by marking materials like pen, pencil, etc.
A. Line
B. Dot
C. Design
2. When two or more lines are combined, a ________ is formed.
A. image
B. shape
C. A and B
3. Line is one of the important ________.
A. principles of design
B. elements of design
C. Art of design
4. ________ is straight line that move up and down without any slant.
A. Horizontal line
B. Diagonal line
C. Vertical line
5. ________ is straight line that are parallel to the horizon.
A. Horizontal line
B. Diagonal line
C. Vertical line
6. ________ are straight thin or thick lines that slant.
A. Horizontal line
B. Diagonal line
C. Vertical line
7. ________ are straight thin or thick lines made from a combination of diagonal lines.
A. Zigzag line
B. Dotted line
C. Curve line
8. ________ are thin or thick lines that change direction gradually.
A. Zigzag line
B. Dotted line
C. Curve line
9. ________ is a line made up of a series of dots.
A. Zigzag line
B. Dotted line
C. Curve line
10. ________ is a line made up of a series of broken lines.
A. Zigzag line
B. Dotted line
C. Dash line
11. ________ are lines in a plane that are always the same distance apart.
A. Two lines
B. Perpendicular lines
C. Parallel line
12. ________ are lines that intersect at right angles.
A. Two lines
B. Perpendicular lines
C. Parallel line
13. ________ and ________ signs are examples of parallel and perpendicular lines respectively.
A. Equal and addition
B. Addition and subtraction
C. Multiplication and division
Draw the following lines:
14. Straight line
15. Vertical line
16. Horizontal line
17. Dotted line
18. Zigzag line
19. Parallel line
20. Perpendicular line
Primary 4 – First Term Examination for Civic Education Questions and Answers

Introduction to Woodwork (Hand Tools) – Hand tools for Woodwork | Classification of Woodwork Hand Tools | Cares and Maintenance for Woodwork Hand Tools
Reading Charts, Diagrams, Calendars, Graphs, etc. to obtain Information (Primary 3)
About The Author
Alabi M. S.
Michael is a Principal Education Officer at LASUBEB with over 15 years of experience in teaching and learning. He is passionate about developing plan lesson notes and promoting quality assurance in education. Michael strongly believes that teachers inspire the future and play a vital role in shaping the next generation.